
Search This Site
Search With Google
Wallpaper Stripper
If you have suffered from moisture or damp problems in your home then you may have to redecorate a room, or infact the whole home. These moisture or damp issues will have been detected by your moisture meter and then the necessary steps taken to prevent the same problem from occurring again. Inevitably you will need to remove old wallpaper to make any progress. Wallpaper removal is not the most pleasurable of tasks and definitely not as simple as it sounds. Unfortunately it is not a simple matter as just pulling the old wallpaper down and replacing it with a newer kind. In fact in certain cases it can be a dreadful task and extremely tedious. But if you have the correct wallpaper stripper tools required for the job then your experience will at least be more tolerable and definitely more time saving and efficient.
Strippable Wallpaper
To remove wallpaper will take you time and some elbow grease but will not be such
a huge task if you follow the steps below. The results should be you having walls
that are completely stripped of any paper and glue allowing you to move on to the
next step of hanging new wallpaper or painting your bare walls. But your first step
is to ascertain the type of wallpaper you are tackling. Is it strippable wallpaper
or non-
If it does then you know you have strippable wallpaper which is the easier of the 2 options you face.
So if the wallpaper is strippable then the wallpaper stripper tools you will need are hot water with a detergent mixed in. A sponge, rubber gloves and a painter’s spatula. To remove the wallpaper just peel it off the wall and when you come across stubborn areas use your sponge and detergent solution to loosen the paper and soften the glue. Then just scrape it away from the wall with your spatula. Once you have removed all the old paper go over the whole wall with the sponge and water solution to remove any left over glue. You could try using a gallon or so of water mixed with 2 cups of vinegar.
This is very effective at removing any old glue from the wall. Other household solutions
that can be used are fabric conditioner or dish detergent. You can try several out
to see which works the most effectively on your old glue. When you have finally removed
all the old glue, you should find yourself with a nice clean, smooth wall ready to
re-
Old Non-
If you find that the wallpaper you need to strip is the old non-
Before you begin to strip it’s a very good idea to empty the room completely of any items such as furniture. If this is not possible then make sure you cover and furniture with tarp to protect it as removing this wallpaper will be a messy job. The first thing to remember is that most wallpapers have a layer on top of them that is water repellent to protect them. So because of this you will need to score the top layer in order to loosen the glue. For this you will use your knife or paper scorer. Score the paper in a crisscross pattern and do not cut too deep as this may damage the wall and plaster underneath the paper. Once you have scored all the paper you need to remove, mix up the chemical wallpaper remover properly according the manufacturers instructions and apply it to the wallpaper using your sprayer or paint roller. Now you can take a small break and make yourself some tea or coffee as you will need to wait for about 15 to 30 minutes for the chemical wallpaper stripper to soak into the paper and do it’s job. When the chemical mixture has thoroughly soaked into the old wallpaper, take your spatula and scrape off strips of the wallpaper. You should start at the bottom of the wall and work your way upwards until you have removed all.
Once you have removed all the old wallpaper rinse the treated area with a heavy detergent mixed with the hot water to remove any remaining glue and stubborn parts. Its more than likely that you will find that you need to carry out some minor repair work to the drywall underneath. You may also need some caulking around the windows, ceiling areas and trim. And when the sheet rock is completely dry you will be able to sand the walls in order to remove any rough spots. After sanding dust off the walls and then you are ready to hang new wallpaper or paint.
Chemical Wallpaper Stripper
If time is of the essence and you do not wish to use the traditional and laborious method of traditional wallpaper removal, then there are chemical wallpaper strippers available for you to use. These chemical wallpaper strippers can come in either foam or liquid forms depending upon which version you prefer. The decorating equipment manufacturers such as Solvite and Polycell produce these types of wallpaper stripper which are freely available in most DIY outlets. They work on the principle of destroying the wallpaper adhesive which bonds the wallpaper to the wall. Once the adhesive has been destroyed the wallpaper can easily be removed. When using a chemical wallpaper stripper certain care should be taken. Always follow the manufacturer’s instructions properly and take care in covering any items you do not wish the chemical wallpaper stripper to come in to contact with.
From personal experience and use, this chemical wallpaper stripper from Polycell proved itself to be highly effective. It made the job of stripping the wallpaper in the lounge that much more quicker and effective. We applied it to the wall and left it for a while to penetrate the wallpaper and it effectively dissolved the wallpaper glue. After removing the wallpaper we also found that there was no damage done to the plaster behind the wallpaper.
To use this particular wallpaper stripper you need to add about half of the contents to 16 pints of cold water. After scoring the old wallpaper you sponge or brush on the mixed solution in a generous manner getting as near to an even application as possible. The instructions on the bottle say leave it for 15 minutes to soak in. Ourselves we left it for about 30 minutes and then began to strip the wallpaper with a stripping knife. Once all the wallpaper has been removed quickly wipe the wall down using soap and water. When using this wallpaper stripper it is advisable to wear safety glasses to protect the eyes and rubber gloves to protect the hands. It is as simple as that to use. But remember to never use this type of wallpaper stripper in conjunction with a steam stripper.
An alternative method to using a chemical wallpaper stripper is to use a wallpaper steamer. You can buy one of these from most DIY outlets or even browse the internet in the comfort of your own home to find one. There are actually a vast number of variety and different styles of wallpaper stripper steamers for you choose from. So take your time in selecting the right one for you as it’s likely it will be a one time lifelong purchase. If you do not wish to purchase a wallpaper stripper like this, you can of course always hire one from a rental store or paint shop. When using a steamer you should work on small sections at a time. The steamer will loosen the wallpaper and then you use your spatula to remove it. Again, as with the chemical wallpaper stripper, work your way up from the bottom to the top. And as just with the chemical wallpaper stripper, once the old wallpaper has been removed you will need to clean the walls in the same way.
So you can use any of these methods of wallpaper stripper to remove old wallpaper and prepare your walls for new wallpaper or painting. When your walls are completely dry from your removal actions then they are ready for painting or applying fresh wallpaper. Whichever you decide to use for your new decoration always use a primer that is specifically designed for the purpose. As wallpaper is hung on smooth walls it is also a good time to consider the texture of the wall if you plan on painting it.
Moisture Meter Guide 2010 Contact details:garnett65@hotmail.com
The complete moisture meter website
Moisture Meter Guide
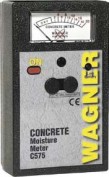
Wagner Moisture Meters
General Tools MMD5NP Pinless LCD
General Tools MMD7003 Precision
General Tools MMD8P Multi Species
General Tools MM700D Precision
Boat Moisture Meter
A moisture meter proves itself to be a useful tool when testing the moisture content levels of boat materials. When assessing a boat, care, judgement and experience should all be employed and then the moisture meter used as the last tool to give the final assessment. Boat moisture tester
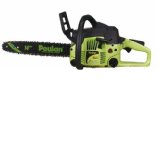
Need A Chainsaw For Firewood?
The petrol chainsaw is used to fell trees, as well as for pruning and cutting overgrowth. Tree surgeons favour the petrol chainsaw and use it for cutting away branches and foliage. Cutting firewood
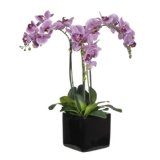
Orchid Moisture Meter
The orchid belongs to a widespread and very diverse family of flowering plants which have fragrant and colourful blooms. Orchids can be found in pretty much every habitat. Keeping orchids healthy
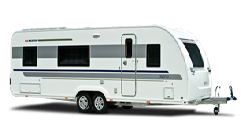
Caravan Moisture Meter
Any caravan that is kept open to the elements all year round can become very susceptible to damp and damp related problems if proper precautions are not taken to prevent this. Moisture levels in caravans
Garden Moisture Meter
The garden moisture meter helps any avid gardener to measure and monitor many different conditions to ensure that they can maintain healthy growing conditions for both indoor as well as outdoor plants. In order to have healthy thriving plants
Wallpaper Removal Techniques
Taking on a new project in your home of stripping old wallpaper and replacing it with new wallpaper can transform any room miraculously. However, before starting on this type of DIY project you first need to ascertain which type of existing wallpaper you have and what is underneath the wallpaper.
In most cases walls are either drywall or plastered. It is easy enough to test behind existing wallpaper by simply touching the wall or tapping it. Plaster is harder and colder and when tapped plaster does not sound hollow like drywall does. If after this simple test you are still unsure, then simply remove a little wallpaper to reveal what is behind it. If you have drywall behind your existing wallpaper then caution is required. Drywall is vulnerable to water damage and you need to avoid over watering it. Also when it comes to scraping, again you need to be extra careful with drywall as it can gouge a lot more easily than plaster.
As to the wallpaper itself, there are 2 types. These are strippable wallpaper and non strippable wallpaper. Hopefully you have strippable wallpaper so your task will be that much easier. However much of the old type wallpapers are non strippable and if you have this then your job difficulty increase significantly.
When it comes to choosing a wallpaper removable technique your decision will depend solely upon the type of existing wallpaper you have and what is behind the wallpaper.
Dry Stripping
This is where you just need to loosen each strip of wallpaper with a putty knife at the corners. You then simply slowly peel the wallpaper away from the wall. Always pull the wallpaper at an angle and not straight out. Pulling the wallpaper straight out has the potential to damage the surface underneath it. This is particularly so if the backing is drywall. Once you have removed all the old wallpaper remove any remaining adhesive to leave yourself with a super smooth surface to work on.
Soaking And Scraping
Non strippable paper requires soaking and scraping off. Sorry but this is unavoidable. For this method you use water and a chemical wallpaper stripper. Soak the wallpaper evenly with the solution using a spray bottle, sponge or paint roller. When the wallpaper is sodden and soaked up most of the solution you can scrape it off the wall using a wallpaper stripper. A tip here is to work in small areas at a time and always scrape from the ground up. If the paper is non porous and will not absorb any liquid then you must perforate the surface of it with a knife so that the liquid can work it’s way in and get to the adhesive.
Steaming
For a super fast and efficient way of removing wallpaper, steaming is the solution. Here you need to use a wallpaper steamer. This method is particularly suitable for old wallpaper that has more than one layer or been painted over. You can rent or buy a wallpaper steamer and the instructions will come with it. You can also read the wallpaper steamer page on this site for further advice on how to properly use this type of wallpaper stripper. One of these can be easily used on a plaster wall but with drywall you need to be extremely careful and tread warily.
Steam Wallpaper Stripper
If you are looking for a wallpaper stripper that will save you time and a lot effort when stripping your old wallpaper then you should take a look at the steam wallpaper stripper. These steam strippers are very simple in design and so easy to use yet also help prevent you making a great deal of mess as you would using a chemical wallpaper stripper or sponge and water. Basically the steam wallpaper stripper is a water tank linked to a hot plate with a hose. When the water in the tank is heated to the correct temperature it gives off steam which passes through the hose to the steam plate. You press this steam plate onto the desired wallpaper you wish to remove and the steam penetrates the wallpaper and melts the glue hence loosing the wallpaper and making it easier to scrape off the wall with your stripper tools.
You will find that using the steam wallpaper stripper is a lot more efficient to use than other methods but always take care when using one. The steam plate becomes very hot and can burn you quite painfully if it comes into contact with your skin. But if used properly and all safety precautions are heeded to then this type of wallpaper stripper is probably the best and easiest way to remove old stubborn wallpaper.
Choosing A Steam Wallpaper Stripper
So above on this page we have shown you a couple of examples of the steam wallpaper stripper. They are a useful tool to have if you are about to embark on a DIY decorating project that requires the removal of old wallpaper. If you have decided that you would like to own a wallpaper stripper like the ones above then there are a couple of considerations you need to think about before buying. If you are going to be a one time user then you can either hire one or if you go for a purchase then just a basic model is suitable for you. These examples are usually very simple in design and lightweight which makes them very easy for you to use. But if you a person that will be doing a lot of decorating or are even a professional then your requirements are much different.
You will need to consider the size of the water tank. A small water tank will mean that you have to keep filling it up and have only limited time use before having to do so. This can become very tiresome and time wasting. However if the unit has a large water tank then it will be a heavier and more cumbersome unit to operate. Also of importance in deciding the right wallpaper stripper for you is the length of the steam hose. If you are working a lot on high ceilings then you will need a longer length in hose. But with this comes the possibility of an accident with you getting caught up in the hose especially if you are working off a platform. And finally will you be needing the unit to remove artex.
Consider carefully everything that you require from your wallpaper stripper and then purchase accordingly. Usually quality comes at a cost but as with most working tools it’s a good idea to go for a recognized brand as these companies have experience and reputations to uphold which generally means you will be investing in a good quality tool. Buy the right wallpaper stripper for you and make an awful job fairly easy and bearable.
Wallpaper Steamers
The wallpaper steamer works by boiling water inside a chamber of it’s body and when the correct temperature is achieved, steam is released down a hose. This steam will travel the length of the hose until it hit’s a faceplate. The faceplate is the part of the steam cleaner that you hold against the wall on top of the wallpaper. The faceplate heats up thanks to the steam and will loosen any adhesive behind the wallpaper. When the adhesive has loosened enough, the wallpaper can be easily removed from the wall.
It was not so long ago that the wallpaper steamer was solely the tool of the professional. The reason for this was their expense. It just was not cost effective for a DIY enthusiast to buy one for any decorating project they had in mind. Nowadays the wallpaper steamer has dropped dramatically in price and is well within most people’s budgets when considering a DIY project. In fact a wallpaper steamer can now be purchased for as little what an electric kettle will cost. Knowing how cheap a wallpaper stripper is will make any pending DIY jobs less daunting and after using one of these you will never go back to solely using a metal scraper ever again.
As with most items, the wallpaper steamer has many different models and they come with different price tags. You can pay a lot for a wallpaper steamer and generally the more you pay for it, the more features that particular wallpaper stripper will have. Extra features will include added safety, added functions and inevitably more flexibility. One particular safety feature you should look out for is a safety release valve. Steam under high pressure could go bang and that is the last thing you want in the middle of a decorating task. Expensive versions of the wallpaper stripper are constructed using materials that always remain cool to the touch.
As well as being used for wallpaper removal a wallpaper steamer can use attachments to turn them in to a steam cleaner. Nozzles and brushes will allow you to use a wallpaper steamer to steam clean carpets and upholstery. These do cost more to buy but the added flexibility and additional usage benefits do justify the rise in price.
When checking out wallpaper steamers you need to compare the steam time of each model. This is the time it takes for the unit to reach the correct temperature, ready for use. Basic models can take a while to heat up properly. Some by as much as 20 minutes. More advanced, and usually more expensive, units can heat up in as short a time as a couple on minutes. Waiting for a wallpaper stripper to heat up properly just adds more unnecessary aggravation to perhaps one of the worst and most laborious of DIY jobs. Buying a wallpaper steamer is a relatively simple process. The majority of DIY stores will stock a range for you to look at and choose from. However perhaps the best way to buy is via the internet. With the internet you are in a position to shop from the comfort of your armchair as well as having the ability to search out and check out a vast number of type and models from a variety of manufacturers. The internet is, and will always be, our preferred way of shopping.
Using A Wallpaper Stripper
By buying yourself a wallpaper stripper you are well on the way to making one of the worst and most laborious DIY jobs more bearable. Before jumping in and using your wallpaper stripper always read the instruction manual first that is supplied with it. This way you will become more aware of how your wallpaper stripper works as well as being familiar with it. When you first take the steamer out of the box check it over thoroughly to ensure that everything is connected correctly. Once you are confident this is so the next step is to fill the water reservoir to the correct level and then plug the unit in. Depending upon the model that you have you may have a short or long wait until it begins to produce steam.
When the wallpaper stripper begins to steam you are in a position to begin work and remove old wallpaper. Press the faceplate of the wallpaper stripper against a section of wallpaper you wish to remove and hold it in position for about 30 seconds. This should be ample time for the steam to penetrate the wallpaper and meet with the wallpaper adhesive and loosen it up. You can then scrape that section of wallpaper from the wall using a scraper. It will come away easily. It is as simple as that. The wallpaper steamer works quite quickly and effectively. Just turn the music on, keep a pot of tea at hand and your wallpaper removal job will become quite bearable with the wallpaper stripper.
Removing Wallpaper
Without a doubt, removing old wallpaper has got to be the most tedious, laborious and time consuming DIY projects one can ever take on. For some reason most of us plan a DIY job such as this for the weekend or a Bank holiday weekend, Which in hindsight is actually quite ludicrous. Weekend’s offer many distractions such as sporting events and friend’s popping out to the local for a drink or two. Even the television can be inviting at these times with decent films and programs filling the box. The World is revolving, yet you are stuck in a room, peeling wallpaper and creating a huge mess on a DIY project that you thought would be simple and quick to do. And who could blame you for thinking that? Peeling paper off a wall, is anything more simpler? If you have removed old wallpaper before then you understand. If it is a new DIY task to you, take heed!
Most wallpapers are hung using a water based adhesive or specialist wallpaper paste. In order to remove this existing wallpaper you need to find the best method of dehydrating or softening of this adhesive or paste. Thankfully the wallpaper stripper gives you a couple of options with regards to this and can help speed up the job significantly. By investing a little money you can have yourself a wallpaper steamer which with the aid of steam can lift wallpaper by softening any adhesive. With one of these you can blast a wall relatively quickly and even make last orders down the pub with your friends. The second type of wallpaper stripper is the chemical wallpaper stripper. Using this requires a lot more work and can prove to be very messy. So turn off your mobile phone, kick the television out of the house and remove any thoughts and distractions from your head. Once started you must keep on to the end with this method. For the techniques of using either of these types of wallpaper stripper, refer above. Otherwise there is a very good and informative site called Ask The Builder which has comprehensive information on most building and DIY projects.
Wallpaper Removal Tips
When using a chemical stripper or soap and water as your desired wallpaper stripper, always work from the top of the wall down. The chemical solution and water can then flow down the wall and be absorbed by the wallpaper. This will reduce wastage. When it comes to stripping the wallpaper though always work from the floor upwards with your wallpaper scraper.
Chemicals and steam need to be protected against. A good pair of rubber gloves and safety glasses will ensure no damage to your eyes and hands.
Before using either option of the wallpaper stripper , always score the surface the existing wallpaper to aid the penetration to the wallpaper adhesive.
When using a steam or chemical wallpaper stripper always ensure that a room is completely free and clear of objects and furniture. The last thing you want to do is damage fixtures and fittings which can cost you dearly.
How To Remove Ceiling Wallpaper
Wallpapering a ceiling was a popular thing to do a few decades ago. Unfortunately it does not look so nice to the eye and many homeowners will not even consider doing it today. For those homeowner’s that do have ceiling wallpaper in their homes, they can not get rid of it quickly enough. As well as looking rather unsightly, ceiling wallpaper has a tendency to peel, crack, stain and become very dirty. So get rid of it! However removing ceiling wallpaper is a tougher job than removing wallpaper from a wall. This is solely due to the positioning of it and the positions you need to work in.
Now removing ceiling wallpaper is a very messy job. So before beginning you need to remove any furniture away out of the room. Once you have done this you have to cover the floor space with some plastic sheets. The ideal wallpaper stripper for this task is the chemical wallpaper stripper, so mix it up properly with water and wear your plastic gloves and safety glasses. Before applying this chemical stripper to the ceiling, put some fabric softener in a spray bottle and once up your stepladder spray the ceiling with this fabric softener. This fabric softener will help moisture the wallpaper and the glue behind it.
Now that the fabric softener is on the ceiling take a perforation tool of choice and score the surface of the wallpaper over the whole of the ceiling beginning in one corner and working across. When you have done this, it is time to apply the chemical wallpaper stripper. Leave the chemicals to do their job for about 15 minutes or so and then begin in one corner to scrape the wallpaper from the ceiling with a broad knife. As each strip of wallpaper comes loose, simply remove it. For any adhesive that remains on the ceiling just reapply some more chemical stripper with a paintbrush to the affected areas and after a couple of minutes just wipe away the remaining adhesive with a sponge.
How To Remove Wallpaper Adhesive
When you remove old wallpaper from the wall you will inevitably be left with some
wallpaper glue on the wall. This has to be removed if you wish to have a nicely finished
new wall after you have painted it or re-
Before starting to remove old wallpaper glue you need to cover the floor where you will be working with plastic or any old towelling. Once the floor is protected take your bucket and fill it with warm to hot water. Try to fill it with water as hot as possible that your hands are comfortable with as you will find that the water will cool very quickly. Take some dishwashing detergent and add it to the water. Use a sponge and wash and scrub the wall where the wallpaper glue is. Work on small areas at a time. If you find that the glue is tough you may need to use a scrub brush instead of a sponge. The soapy detergent will loosen the glue and it will either drop off the wall or be easily wiped away with the sponge. After scrubbing the walls refill your bucket with clean water and wash your walls again. What you are doing is removing the soapy water so it will be a lot easier than the initial scrubbing. What you should be left with is a clean and smooth wall.
How To .…
Tidy up peeling wallpaper
Firstly moisten it with a little water. This will prevent any edge curling. Take some wallpaper adhesive and apply it to both the wallpaper and the wall. Press the paper firmly back on to the wall and wipe away any excess adhesive with a damp sponge.
Put Up A Wallpaper Border
Take the border wallpaper and cut it to the required length that you require. Next apply wallpaper border adhesive to the border and the wall. Do this evenly. Position the border on to the wall in the desired place and smooth it out with a sponge. Finally wipe away any excess adhesive with a damp sponge.
Prepare A Wall For A New Wallpaper Finish
Remove any old existing wallpaper with your chosen wallpaper stripper. Clean the wall with a soapy detergent mix to remove any adhesive that remains on the wall. Wash the wall thoroughly. Check the wall thoroughly to see if it requires any minor repairs. For shallow holes simply fill with polyfilla and smooth off. For cracks and small holes apply a quick drying polyfilla and again smooth off. Your wall is now fully prepared and ready for the new wallpaper.
| Tramex Moisture Encounter Plus |
| Tramex Compact Wood Moisture Meter |
| Tramex Concrete Encounter Moisture Meter |
| Tramex Skipper Plus Moisture Meter |
| Tramex Roof And Wall Moisture Scanner |
| Sonin Digital Moisture Meter model 50218 |
| Sonin Digital Moisture Meter 270 model 50270 |
| Sonin Moisture Test Tool model 50210 |
| Sonin Moisture Test Meter Model 50211 |
| Oak |
| Douglas Fir |
| Beech Tree |
| Elm Tree |
| Hickory Tree |
| Maple Tree |
| Pine Tree |
| Prevent And Repair Gaps In Wooden Floorboards |
| How To Fix A Squeaky Hardwood Floor |
| How To Repair A Hardwood Floor That Has Buckled |
| Which Is The Best Firewood? |
| Concrete |
| Concrete Moisture |
| Screed Moisture Meter |
| SDS Drill |
| Belle Cement Mixer |
| SDS Drill Advice |
| Which SDS Drill |
| SDS Drill Accessories |
| Drilling Into Concrete |
| Kennedy Tool Box |
| Moisture - Basic Facts |
| Types Of Damp |
| Wet Rot |
| Dry Rot |
| Mold |
| Water Leak Detection |
| Stucco Moisture |
| Water Damage |
| Moisture And Rust |
| Moisture Damage To A Chimney |
| Wallpaper Stripper |
| Plaster Mixer |
| Why Worry About Moisture Problems |
| Does Your Home Have A Moisture Problem? |
| How To Solve Moisture Problems |
| How To Use Anti Mold Paint |
| Rising Damp |
| Condensation |
| Salt Damp |
| How To Avoid Bathroom Condensation |
| How To Remove Black Mold |
| How To Prevent Bathroom Mold |
| Soldering Kit |
| Soldering Kit Contents |
| Soldering Kit Advice |
| Bonsai Tree Classification |
| Growing Bonsai From Seed |
| Bonsai Tree Care |
| Bonsai Tree Training |
| Bonsai Tools |
| Displaying Bonsai |
| Bonsai Calendar |
| Bonsai Plants |
| The Thirsty Light Curve Moisture Meter |
| The Thirsty Light Ladybird Moisture Meter |
| The Thirsty Light Bumble Bee Moisture Meter |
| The Thirsty Light Butterfly Moisture Meter |
| Hanna Instruments |
| Agratronix Portable Coffee Moisture Tester |
| Lawn Aerator |
| Lawn Roller |
| Lawn Rake |
| Lawn Sand |
| Chainshot |
| Chainsaw Gloves |
| Chainsaw Trousers |
| Chainsaw Boots |
| Mac 4 - 20 XT Chainsaw |
| Mac 738 Chainsaw |
| Mac 842 Chainsaw |
| Mac 20X Power Chainsaw |
| Einhell BG-PC 3735 Chainsaw |
| Einhell BG-PC 4040 Chainsaw |
| Einhell BG-PC 5045 Chainsaw |
| Poulan P3314 Chainsaw |
| Poulan P4018 Chainsaw |
| Poulan Pro PP3816AV Chainsaw |
| Poulan Pro PP4218AVX Chainsaw |
| Poulan Pro PP4620AVX Chainsaw |
| Efco MT 4100 SP Chainsaw |
| Efco MT 3500 Chainsaw |
| Efco 132 S Chainsaw |
| Efco 147 Chainsaw |
| Efco 152 Chainsaw |
| Efco MT 7200 Chainsaw |
| Efco MT 8200 Chainsaw |
| Efco MT 3750 Chainsaw |
| Methods Of Obtaining Soil Moisture Levels |
| Hygrometer |
| Psychrometer |
| Rain Gauge |
| Wave Ventilation System |
| Humidity |
| Hygrometer For Keeping Reptiles |
| Humidor |
| Weather Stations |
| Musical Instrument Storage |