

Search This Site
Search With Google
SDS Drill Advice
Buying yourself an sds drill is a wise investment to make if your are a building contractor or DIY enthusiast. They are a step up on the conventional drill and can be used in many applications. But despite their advanced technology and capabilities these sds drills basically operate and have the same components as a standard drill. When you have a sds drill you will teach yourself how to use it properly and with the aid of this page you will also fully understand the workings of a sds drill and any problems that may occur. Having knowledge of how the sds drill works will give you an advantage if it actually stops working. You will know what to do look for and quite possibly be able to fix the problem without having to take the sds drill to a repair specialist.
So if you have the time, do take 5 minutes and read this page thoroughly. Your sds drill may well be an exceptional tool and never break down or give you any problems. But like most power tools it will be subject to wear and tear and as we all know this can eventually lead to problems. And if you never need the knowledge for yourself, it can always be used to help a friend out.
SDS Drill Workings
Every power tool takes electrical energy from either a mains outlet or battery. The electric motor of the power tool will then convert this electricity in to physical energy. The physical energy that the sds drill motor creates is then applied in the drill’s work. Though most power tools are similar in their workings what makes each power tool different is how they use this physical energy that is produced. They produce the physical energy in much the same way and in our opinion this is where the majority of power tool issues and problems occur. On the maintenance side of things with a power tool, most maintenance is required around the production components of physical energy.
The electric motor in a sds drill is quite complex but you do not need to be a rocket scientist to understand the basic functions and parts of it. When you know the basics about an electric motor and it’s components, working out and diagnosing problems will be a lot simpler. It’s amazing how quick and simple some repairs are to a power tool are. We have all been in situations where some sort of electrical item has stopped working. And what do you do? Due to the complex looking nature of things and lack of knowledge we take the electrical item to be repaired which can cost nearly as much as replacing the item. Yet the repair can actually be very simple and easy to carry out. In some cases, we too, have actually thrown out the electrical item!
Basic Parts Of The SDS Drill
Electric power tools have many similar tool parts to them and the sds drill is no exception. All power tools use the same basic principles of producing their physical energy with the electric motor converting electrical power in to physical power. When electrical energy enters in to a power tool it goes through a process of conversion from the basic parts within the tool. Below is a list of the key parts and a short description on each to help you understand more and point you in the right direction with the wear and tear issues you may experience with your sds drill.
When plugged in and the power switched on, electrical energy will enter the power tool’s power cord. This electricity will run along the wires of the power cord until it reaches the connection where the wires are attached to the tool’s on/off switch. If the switch is in off position the electricity will stall as the electric circuit is broken. When this switch is turned to on, then the electric circuit is complete and the electricity will pass to the motor and allow the tool to operate.
Before reaching the motor of the sds drill, the electricity will make other points of contact before it is converted in the motor. When the electricity passes the on switch it will pass through the carbon brushes of the tool. These carbon brushes are actually small pieces of carbon which provide contact points between the sds drill motor and the power source. The way the carbon brushes take the electricity to the motor is by direct contact to the motor. The part of the sds drill where the carbon brushes contact the motor is called the armature. And the precise spot where the brushes connect to the armature is called the commutator.
An armature is actually half of the sds drill motor. The other half of the motor is called the field. The field fits around the armature and they work together to produce the physical energy. From the motor comes a motor shaft where the physical energy is passed. This motor shaft is then applied to the tools work.
These are the basic parts of a sds drill and when you know how the electricity travels and how it is converted, you have a good enough knowledge of the workings to be able to deal with a large number of working problems with the sds drill.
SDS Drill Power Cords
Believe it or not there is quite a lot to know about the power cord to help you prevent any damage to it and a power tool. The power cord for a power tool can be either a 2 wire or 3 wire version. The 2 wire power cord will protect a tool operator from a possible electric shock with a double insulation system. The plug at the end of a 2 wire cord will be 2 pronged and can come in a variety of gauges. The 3 wire power cord will also protect an operator from electrical shock with it’s third ground wire. This ground wire will take any extra electrical charge away from the tool and user. The plug on this type of power cord will be 3 pronged and also come in a variety of gauges. The 3 wire power cord is usually found in the United Kingdom.
Gauge is a measurement of the power cord. It is a measurement used to measure the diameter of a power cord or a bundle of wires. The higher the gauge measurement the smaller the diameter of the power cord is and vice versa. So for example a 16 gauge power cord will have a thinner diameter than a 14 gauge power cord.
To check the power cord on your sds drill is easy to do. Any signs of damage are usually highly visible to the eye. If the power cord is cut, damaged or worn then a new power cord is required. A damaged or worn power cord will short or deliver less power to the sds drill.The power cord can be susceptible to heat damage. So if the sds drill is not getting enough voltage from the power cord it can actually overheat. With a lack of voltage the motor of the sds drill will work harder and pull in more amps to compensate for the lack of voltage. This will result in overheating and will damage the motor of the tool. So always keep an eye on the power cord. Cut or worn power cords need to be replaced immediately. Another issue to be aware of is the use of an extension cord. If you use too much extension cord the supply of power will weaken to the sds drill. This too will cause overheating.
Keep your eye on your sds drill for any heat build up. Ensure that you know the amperture rating and type of power outlet you are using. Make sure that you do not use too much length of power cord as well. If the sds drill has overheated you will be aware of this from sparking, smoke or a big decrease in power. Prevention is better than a cure. So be careful and do not let your sds drill overheat because of something as simple as a faulty power cord.
Power Switches On The SDS Drill
The switches on the sds drill either complete or disrupt the electrical contact by means of contacts. Even though there may be different switches on your sds drill, they all work in the same way. The variable speed switch will work through steps to increase the power to the drill. Though these switches do give the operator more control over the drill, they do have a tendency to wear out quicker. The switches work by completing a circuit when the contacts touch. When they are switched on and off there is friction caused which will result in wear on them and it is not unusual for the need of switches to be replaced during the working life of a sds drill.
Moisture Meter Guide 2010 Contact details:garnett65@hotmail.com

The complete moisture meter website
Moisture Meter Guide
Boat Moisture Meter
A moisture meter proves itself to be a useful tool when testing the moisture content levels of boat materials. When assessing a boat, care, judgement and experience should all be employed and then the moisture meter used as the last tool to give the final assessment. Suitable moisture meters for taking readings on boats
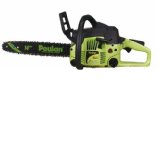
Need A Chainsaw For Firewood?
The petrol chainsaw is used to fell trees, as well as for pruning and cutting overgrowth. Tree surgeons favour the petrol chainsaw and use it for cutting away branches and foliage. For cutting your own firewood a chainsaw is a must
Orchid Moisture Meter
The orchid belongs to a widespread and very diverse family of flowering plants which have fragrant and colourful blooms. Orchids can be found in pretty much every habitat. A suitable moisture meter to help grow orchids
Caravan Moisture Meter
Any caravan that is kept open to the elements all year round can become very susceptible to damp and damp related problems if proper precautions are not taken to prevent this. Damp can cause many problems in a caravan

Garden Moisture Meter
The garden moisture meter helps any avid gardener to measure and monitor many different conditions to ensure that they can maintain healthy growing conditions for both indoor as well as outdoor plants.
For your garden and plants a suitable moisture meter is recommended
Checking for wear damage on a switch is quite difficult as the wear will not be visible.
But there are signs of switch wear you need to be familiar with. If your sds drill
does not start when the switch is in the on position and power is received you need
to check the switch. If the wear on the switch has not reached critical level you
may find that your sds drill will start up sometimes-
Switches can also be greatly affected by moisture. Here you will discover that the switches will short out when moisture gets in to their workings. Sparks appearing when you turn the sds drill on are a sure sign that moisture has got in to the switch. Also if a switch shorts out it will not work again and need to be replaced.
As well as moisture, overheating can destroy a switch’s capabilities. If the sds drill gets too hot the switches are sensitive components and are extremely vulnerable to overheating. After overheating you may not be able to start your sds drill again. This is where you need to check out the on off switch to make sure that it has not been burned out. What you will be looking for is melting or colour changes. It is very easy to replace a switch on a sds drill, but it does need to be done immediately is overheating symptoms are discovered.
Carbon Brushes On The SDS Drill
Carbon brushes are the part of the sds drill that make contact with the drill motor to complete the electrical circuit when the drill is working. They can be either square or rectangular with one end being connected to the wires from the switch and the other end making contact with the motor. These carbon brushes connect with the armature part of the motor. These carbon brushes are held in place by brush holders to ensure that they make contact with the armature at the correct and desired angle. The brushes also have springs to ensure the correct pressure of contact is applied to the armature.
When the sds drill is in operation the armature will spin round at speed. This means that the carbon brushes will wear down when the drill is in use. The more the sds drill is used the more the brushes will wear. When the carbon brushes are worn it will be hard to start the sds drill. Sometimes the drill will start and sometimes not. This does sound familiar to the problem with the on off switch. So if you experience this problem, check the on off switch first and if that is fine the next port of call is the carbon brushes. On the carbon brushes will be a wear line indicator. When this line has been passed, the brushes are worn.
Carbon brushes are affected by overheating. If your sds drill is overheating it will wear the brushes down quicker and also make them less conductive. If your carbon brushes are affected by overheating you will notice burn marks and a contoured wear pattern. Another sign is the change in colouration of the wires connected to the carbon brushes.
The carbon brushes can also be damaged by the armature. If the armature is worn is can chip the brushes. This will result in gaps in conductivity and the sds drill will only work when these gaps line up perfectly. When the carbon brushes are worn or chipped they need to be replaced. This is a simple procedure but one tip is to always check the armature before inserting new brushes. If the armature is worn then the brushes will wear out faster or get chipped.
SDS Drill Armature
The 2 major components of a sds drill motor are the armature and field. The armature is a shaft piece which will spin as the drill is being operated. The armature connects to the carbon brushes of the drill to complete the electrical circuit. The armature will also have a fan attached to it for the purpose of cooling the drill and keeping it dust free. The armature plays a key role in any sds drill and needs to be a tough component, which it is. However it can still be susceptible to overheating and wear. A damaged armature needs to be replaced immediately. If not the kick on effect will be the premature wearing down of the carbon brushes.
When checking the armature for damage or wear look for chipping and low grooves. A chipped armature will have segments missing from it. An armature will suffer from overheating. You will know this by heat, sparks and smoke from the drill. Also armature melting will be very dramatic and pretty obvious.
SDS Drill Field
Finally we shall look at the sds drill field. Fields are the other major component of a motor of a power tool. The field will work in conjunction with the armature to create the physical energy that the sds drill requires to operate. It is ring like and fits around the armature. When the sds drill is working the armature spins around inside the field. Just like any other component of a sds drill the field can go wrong or wear.
A field will fail if the armature breaks or overheats. In this case one part of a motor will quickly affect another part. The field can quickly be ruined by a sds drill that is overworked. In this case the field will cook at a dramatic rate. So ensure that your sds drill never exceeds it’s specifications.
To check to see if the field is damaged is easy enough. It will act like a damaged armature producing heat, sparks and smoke from the motor out through the ventilation ducts of the drill. The sds drill will also drop rapidly in it’s performance levels. If the field is damaged you need to replace it but you can prevent damage by following workload specs of your sds drill and never overworking it. Also if the armature begins to show signs of wear, replacing it quickly will help to preserve the field.
Sds Drill Safety
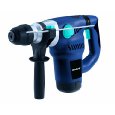
Today the SDS drill comes in a great variety of types and different models with each particular SDS drill designed for their particular purpose and application. The usual and quickest way to ascertain the overall power of the drill is to note the voltage which will give you an indication of the overall power. The cordless or battery SDS drill tend to have a power range of between 12 to 32 volts. Not too powerful or heavy to use, these types of drill are perfect for the handyman as they eradicate the need to have an electric outlet. They are also safer to use as there are no trailing cables that could cause an accident especially if you are working from a ladder.
The more powerful SDS drill are the ones that are used for tougher jobs and usually require power from a mains wall socket. The advantage of these drills is that the user has no worries about running out of power and not being able to finish the job. However they are heavier drills and you do always have to keep your eye on where the cable is.
When using the SDS drill you must remember that you do have a powerful tool in your hands. And because of this you need to exercise great care and pay particular attention to yourself , your fellow workers and the current surroundings you are in. The drill can be dangerous and to say the least, very unpredictable if in the wrong or inexperienced hands. So always be vigilant when using the SDS drill.
Safety equipment also should always be worn when using the SDS drill. The types of safety equipment and protection available are such items as eye protectors and ear plugs.
For your eyes you should consider safety glasses or goggles to prevent any dust, flying debris or any loose debris entering your eyes and causing damage. For your ears, ear plugs are a very good idea as the SDS drill can be noisy and over an extended period of activity the ears will be exposed to all this noise. If you have sensitive ear drums then you could find yourself having problems with the ears if you do not take safety precautions.
When using the SDS drill make sure you have the correct tool for the job. It is advisable to always buy the best quality equipment and accessories that your budget allows. Before beginning any job ALWAYS check the drill properly to make sure everything is in correct working condition. Do the same when you finish every job. That way you are sure to have a drill that is always in tip top working condition. If the SDS drill you own is a mains corded drill you should always pay particular attention to make sure there are no loose connections or even bare wires showing that could give you a very nasty electric shock. Another point worth bearing in mind is also to keep an eye on the SDS drill bits and attachments. If they are old or worn out you should replace them. Using old or worn out equipment can be a danger to your safety.
So take good care of your SDS drill, use common sense when in operation with it and you should find yourself having many years of trouble free and safe usage of your SDS drill.
Safety Tips For Using The SDS Drill
The SDS drill is a gift to tradesmen and DIY enthusiasts alike. Because of new technology these tools are more powerful, last longer and are more convenient to use. However you need to remember that a SDS drill has moving parts and is a power tool. Applying safety techniques and commonsense are all parcel to using a SDS drill.
1-
2-
3-
4-
5-
6-
7-
8-
9-
10-
Sds Drill Care
The introduction of the SDS drill, by Bosch in 1975, has proved to be a revelation amongst builders, plumbers, electricians and the avid DIY fraternity. The drilling of holes in such materials as concrete, masonry and steel has been simplified and made somewhat easier, to say the least. With the sds system the sds drill lets nothing stand in it’s way. There are basic sds drills, sds hammer drills and cordless sds drills available to choose from, each providing solutions for respective users.
Once owning a sds drill, it is little wonder why tradesmen become reliant upon them and reach for them most days when on the job. They are not cheap to buy, but well within budget when you consider the abilities and performance they produce, and weigh up the pros and cons of investing in one. Having invested in a sds drill though, just paying the drill a little attention and giving a little care, the sds drill will last a lot longer as well as being a lot safer.
Casing
As with any power tool that is subject to wear and care, the sds drill will have an outer casing or shell to protect all the internal workings. With the sds drill it is the outer casing that keeps the drill together in one piece. It is also there to prevent dust and debris entering the drill and provide a smooth comfortable place for you to place your hands. You need to constantly monitor the outer casing of your sds drill.
If for any reason the case gets cracked or the screws that fix it become loose, then added stress is the result to the drill. Dust and debris will find it easier to enter the drill and bearings will wear a lot faster. And if you have ever caught a piece of your skin in a crack on a drill case you will know how painful this can be.. So always tighten any screws that come loose and for any cracks that are not too serious try to seal them with an appropriate glue or cover with a suitable and comfortable taping.
Chuck
On any sds drill it is the chuck that takes the brunt of any force from the drill. In fact in certain cases they are extremely overworked and need to be cared for. When you buy a new sds drill it will come with a tube of lubrication. This lubrication is for the chuck and should be applied when and as the manufacturer advises. A well lubricated chuck will last longer and perform to a better standard. A chuck that does not work properly will result in an expensive visit to a service agent.
Brushes
A very common problem with most power tools is when the brushes suffer from wear and tear. These brushes are small sticks of a carbon material that actually allow the flow of electricity around the commutator. The symptoms of the brushes wearing out are that the sds drill will slow down, work in an erratic fashion or simply refuse to work at all. But do not despair if this happens to you and definitely do not discard the drill if it fails to work at all.
Brushes are relatively easy to replace on an sds drill. Some models will require you to open up the casing to replace the brushes while other models will have 2 slots in the side of the drill where the brushes can be reached and replaced. If you look through the ventilation holes on your sds drill you will see that worn brushes create a lot of arcing. This in turn produces a lot of dust and this dust will in time ruin the commutator. Whenever you see a lot of sparking, again, you must replace the brushes on your sds drill.
Storage Case
A new sds drill should be supplied with a robust storage case. To keep your drill in good condition always store it in this storage case to keep it free from debris.
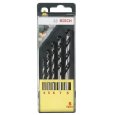
Drill Bits
When working with a sds drill always ensure that you are working with the correct drill bit for the job in hand. If the drill bit is too small or too large then you run the risk of the drill catching. If a drill does suffer from catching there is an awful amount of stress placed on the internal components of the drill. This leads to increased wear and tear, or even breakage. Using the wrong drill bits can also cause damage to the project you are working on. Blunt or dull drill bits should never be used with a sds drill. They do not do a good job and place additional stress on the drill. Again, the result is excessive wear and tear to the drill and even breakage.
Natural Elements.
Never leave your sds drill outside exposed to natural elements. It is easy to work outside and forget to bring your drill inside again. Leaving the drill outside will expose it to dust and pollen which can eventually jam the drill. Also any moisture in the air can cause rusting to the drill. This can render a drill useless.
Batteries
If you have a cordless sds drill you should never store the batteries in extreme temperatures. Low temperatures will result in the battery being slow whilst high temperatures can lower the effectiveness of the battery. Any damage done to a drill battery will result in that battery having to be replaced. This is expensive and unnecessary.
Sds Grease
When you buy a sds drill the sds drill chuck will come pre greased from the specific manufacturer. Using your sds drill on a regular basis and changing the drill bits frequently however, removes a lot or even most of this grease. Without proper greasing your sds drill will suffer from both binding and friction in the chuck. The result of this will be a dramatically reduced work life of the sds drill and it’s chuck.
To combat this potential damage to your sds drill you need to buy yourself a high performance sds grease. Once you have acquired a suitable sds grease, keep it in your tool box and use it when required. The ideal usage is to always apply a small amount of the sds grease, a smear is enough, on the bottom of each sds drill bit that you intend to insert in the chuck and use. It is a just a tiny task, but one which will go a long way to extending the working life of your sds drill.
Alternatives To SDS Drill Bit Grease
SDS drill grease is specifically designed and manufactured to be used with a sds drill. Without lubrication the sds drill bit can not be inserted in to the chuck and be expected t perform properly. The drill bit requires grease in order to slip in to the drill shank. However in our opinion there is a lot of over play in the marketing of sds grease. Yes it works and provides all the lubrication solutions you require with your sds drill.
However having used grease that is not sds drill specific on my sds drill, I feel it’s fair to say that just as long as you use a lubrication of any sort on your sds drill, it will perform and be protected to pretty much the same levels as that provided by specific sds grease.
The main issue here is that a sds drill must be lubricated but the types of lubrication can actually vary. As well as sds grease, other types of lubrication can include petroleum jelly, beeswax and metal soap. Petroleum jelly is a very capable alternative to sds grease. Just a dab can be used on the end of the drill bit before inserting it. It will give the necessary lubrication required to slide the bit in to place. When you have finished working with the sds drill the petroleum jelly is very easy to clean off the bit. However the petroleum jelly can not be used as a cooling agent.
Beeswax is usually used for a lubricant with screws. But you can rub it on a sds drill bit for smooth insertion in to the chuck. It is a natural lubricant and you will find that several different types of drill grease actually contain beeswax. Finally metal soap can also be used as a lubricant. Metal soap is usually made from linseed oil and is used by many because it lubricates and has cleaning properties as well. After using metal soap you do not need any other cleaning agents because the soap is already there.
SDS Grease FAQs
If you grease the sds drill bits every time before inserting them with a standard grease you run the risk of the rubber seal in the chuck becoming soft and sticky. And if this happens the seal could actually stick to the drill bit and pop out. Specialized sds grease will prevent this from happening and not affect the rubber in any way.
Any molybdenum disuphide grease will actually suffice and protect against rubber rotting. It does not break down and will not rot the rubber in a chuck. You can buy yourself a tub of this grease from any car parts shop.
This whole theory of you must grease sds drill bits before inserting them can at times be a little overplayed. Sure lubrication is a good thing but I have known people that have used the sds drill for months without greasing the drill bits and when you read a lot of the user manuals that do come with a sds drill, there never seems to be a mention of using a special sds grease. I think it is more of a personal preference thing and a “feel” of how your sds drill is performing. If you think your sds drill bits need lubricating then do so.
A hammer drill is a versatile and powerful drill to own. Add the sds drill system to a hammer drill , and what you have is a hammer drill with a much improved hammer action resulting in greater drilling power Sds Hammer Drill.
Sds Hammer Drill
On This Site
Cordless SDS Drill
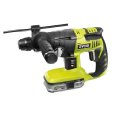
A cordless sds drill offers you the flexibility that is required in the building trade. No longer are you reliant on an electrical socket and for working literally anywhere the cordless sds drill has to be the choice. Cordless SDS drill
Safety With The Sds Drill

When using any power tool it is essential that you follow all working procedures correctly and wear all the appropriate safety gear to protect yourself. SDS drill safety
Accessories For SDS Drill
For continued successful usage of the sds drill you will require all the necessary accessories such as sds drill bits. Sds drill accessories
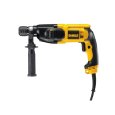
The choice of many, the Dewalt sds drill has built itself a reputation of quality and reliability. Dewalt sds drill
Dewalt
| Tramex Moisture Encounter Plus |
| Tramex Compact Wood Moisture Meter |
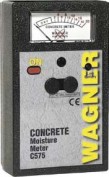
| Tramex Concrete Encounter Moisture Meter |
| Tramex Skipper Plus Moisture Meter |
| Tramex Roof And Wall Moisture Scanner |
| Sonin Digital Moisture Meter model 50218 |
| Sonin Digital Moisture Meter 270 model 50270 |
| Sonin Moisture Test Tool model 50210 |
| Sonin Moisture Test Meter Model 50211 |
| Oak |
| Douglas Fir |
| Beech Tree |
| Elm Tree |
| Hickory Tree |
| Maple Tree |
| Pine Tree |
| Prevent And Repair Gaps In Wooden Floorboards |
| How To Fix A Squeaky Hardwood Floor |
| How To Repair A Hardwood Floor That Has Buckled |
| Which Is The Best Firewood? |
| Concrete |
| Concrete Moisture |
| Screed Moisture Meter |
| SDS Drill |
| Belle Cement Mixer |
| SDS Drill Advice |
| Which SDS Drill |
| SDS Drill Accessories |
| Drilling Into Concrete |
| Kennedy Tool Box |
| Moisture - Basic Facts |
| Types Of Damp |
| Wet Rot |
| Dry Rot |
| Mold |
| Water Leak Detection |
| Stucco Moisture |
| Water Damage |
| Moisture And Rust |
| Moisture Damage To A Chimney |
| Wallpaper Stripper |
| Plaster Mixer |
| Why Worry About Moisture Problems |
| Does Your Home Have A Moisture Problem? |
| How To Solve Moisture Problems |
| How To Use Anti Mold Paint |
| Rising Damp |
| Condensation |
| Salt Damp |
| How To Avoid Bathroom Condensation |
| How To Remove Black Mold |
| How To Prevent Bathroom Mold |
| Soldering Kit |
| Soldering Kit Contents |
| Soldering Kit Advice |
| Bonsai Tree Classification |
| Growing Bonsai From Seed |
| Bonsai Tree Care |
| Bonsai Tree Training |
| Bonsai Tools |
| Displaying Bonsai |
| Bonsai Calendar |
| Bonsai Plants |
| The Thirsty Light Curve Moisture Meter |
| The Thirsty Light Ladybird Moisture Meter |
| The Thirsty Light Bumble Bee Moisture Meter |
| The Thirsty Light Butterfly Moisture Meter |
| Hanna Instruments |
| Agratronix Portable Coffee Moisture Tester |
| Lawn Aerator |
| Lawn Roller |
| Lawn Rake |
| Lawn Sand |
| Chainshot |
| Chainsaw Gloves |
| Chainsaw Trousers |
| Chainsaw Boots |
| Mac 4 - 20 XT Chainsaw |
| Mac 738 Chainsaw |
| Mac 842 Chainsaw |
| Mac 20X Power Chainsaw |
| Einhell BG-PC 3735 Chainsaw |
| Einhell BG-PC 4040 Chainsaw |
| Einhell BG-PC 5045 Chainsaw |
| Poulan P3314 Chainsaw |
| Poulan P4018 Chainsaw |
| Poulan Pro PP3816AV Chainsaw |
| Poulan Pro PP4218AVX Chainsaw |
| Poulan Pro PP4620AVX Chainsaw |
| Efco MT 4100 SP Chainsaw |
| Efco MT 3500 Chainsaw |
| Efco 132 S Chainsaw |
| Efco 147 Chainsaw |
| Efco 152 Chainsaw |
| Efco MT 7200 Chainsaw |
| Efco MT 8200 Chainsaw |
| Efco MT 3750 Chainsaw |
| Methods Of Obtaining Soil Moisture Levels |
| Hygrometer |
| Psychrometer |
| Rain Gauge |
| Wave Ventilation System |
| Humidity |
| Hygrometer For Keeping Reptiles |
| Humidor |
| Weather Stations |
| Musical Instrument Storage |