
Search This Site
Search With Google
How To Change Fuel Lines
Moisture Meter Guide
The complete moisture meter website
As with the primer bulb on the chainsaw, the fuel lines on the chainsaw require regular maintenance and replacing. The fuel lines are made out of plastic and do suffer from wear and tear as well as cracking.
And we all know that the last thing we want is a leaking fuel line on any petrol powered tool.
So whenever giving your chainsaw the once over you should always pay attention to the fuel lines and ensure that they are not leaking in any capacity and are correctly attached.
Changing fuel lines on the chainsaw is simple enough to do. Basically you remove them by unscrewing them and just fitting the new lines and securely attaching them in place. Simple enough to do.
However what many forget is that the fuel lines have a routing system and it is very easy to mix up this routing system when you remove the old fuel lines.
The carburetor on the chainsaw can be one of two major designs and both have different routing orientations, so you need to know about both.
Moisture Meter Guide 2010 Contact details:garnett65@hotmail.com
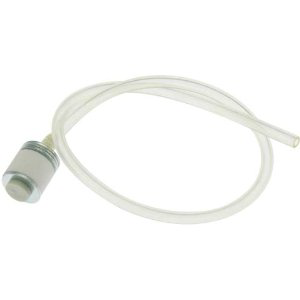
The Fuel Line Routing Where The Primer Bulb Is Attached To The Carburetor
As said earlier, replacing fuel lines on a chainsaw is child’s play. But where the difficulty comes in to play is the routing issue. The thing is, for reasons we do not know, manufacturers tend not to mark their carburettors which is the incoming and which is the outgoing port. And because it is an easy mistake to make and forget the correct orientation when you remove the fuels lines, this can cause a little difficulty as you must have the fuel lines in their correct respective places for the fuel system on the chainsaw to operate correctly.
A carburetor that has the primer bulb attached to it will use the primer bulb to pull fuel through the line in to the carburetor. It will also push the fuel out of the carburetor using the return fuel line. If the fuel lines are attached properly to their correct ports then everything functions properly.
If you haven’t then you will experience all sorts of working and starting problems with your petrol chainsaw. Without helpful markings on the carburetor to assist you with this problem, there is a test you can carry out to ensure that the fuel lines have been attached to their correct ports.
The Fuel Line Routing Where The Primer Bulb Is Remote
If the chainsaw you have has a primer bulb system where the system is separate from the carburetor, then you will be aware that the fuel routing in this case is a little more complex than with a primer bulb system that is mounted on the carburetor. The reason for this is that there is a third fuel line in the equation. With this particular type of system you need to remember that the primer bulb assembly is there to pull the fuel through the carburetor and not in to it. After changing the fuel lines on this type of system there are a couple of tests you need to perform to ensure that the fuel lines are attached correctly.
The first test is test the primer assembly. Fuel will only flow one way through them so it is important that you distinguish between the input and output side of the primer. You do this by attaching the fuel lines to the assembly unit and then place both line ends in 2 stroke fuel. Prime the bulb and you will see bubbles emerge from the line which is attached to the out going side of the primer. This means that it is the return fuel line. The other line will not emit any bubbles and is the one which must be attached to the carburetor because the fuel needs to be pulled through the carburetor in to the primer bulb.
In order to test for the fuel routing with this system simply attach the incoming fuel line on to your primer to one of the ports on the carburetor and then attach the third fuel line to the other port. Submerge both lines in 2 stroke fuel and prime. If you see bubbles come out of the primer assembly return line then you know that the fuel lines are attached correctly. If you discover that the primer bulb gets stuck then you will know immediately that the fuel lines are located incorrectly and need to be changed over.
To Care Is To Share
To perform this test just simply attach the fuel lines to the carburetor ports. It is ok to use guesswork here. Once you have attached the fuel lines to the carburetor ports simply place the ends of the fuel lines in 2 cycle fuel and prime the primer bulb. If you see that fuel is pushed out of unfiltered line then you know that the fuel lines are in their correct ports. However if you see bubbles emerging out of the line with the fuel filter on it, then you have attached the fuel lines incorrectly. So switch them over and just carry out the test again to make doubly certain that they are attached correctly.
The Fuel Line Routing Where The Primer Bulb Is Attached To The Carburetor
| Tramex Moisture Encounter Plus |
| Tramex Compact Wood Moisture Meter |
| Tramex Concrete Encounter Moisture Meter |
| Tramex Skipper Plus Moisture Meter |
| Tramex Roof And Wall Moisture Scanner |
| Sonin Digital Moisture Meter model 50218 |
| Sonin Digital Moisture Meter 270 model 50270 |
| Sonin Moisture Test Tool model 50210 |
| Sonin Moisture Test Meter Model 50211 |
| Oak |
| Douglas Fir |
| Beech Tree |
| Elm Tree |
| Hickory Tree |
| Maple Tree |
| Pine Tree |
| Prevent And Repair Gaps In Wooden Floorboards |
| How To Fix A Squeaky Hardwood Floor |
| How To Repair A Hardwood Floor That Has Buckled |
| Which Is The Best Firewood? |
| Concrete |
| Concrete Moisture |
| Screed Moisture Meter |
| SDS Drill |
| Belle Cement Mixer |
| SDS Drill Advice |
| Which SDS Drill |
| SDS Drill Accessories |
| Drilling Into Concrete |
| Kennedy Tool Box |
| Moisture - Basic Facts |
| Types Of Damp |
| Wet Rot |
| Dry Rot |
| Mold |
| Water Leak Detection |
| Stucco Moisture |
| Water Damage |
| Moisture And Rust |
| Moisture Damage To A Chimney |
| Wallpaper Stripper |
| Plaster Mixer |
| Why Worry About Moisture Problems |
| Does Your Home Have A Moisture Problem? |
| How To Solve Moisture Problems |
| How To Use Anti Mold Paint |
| Rising Damp |
| Condensation |
| Salt Damp |
| How To Avoid Bathroom Condensation |
| How To Remove Black Mold |
| How To Prevent Bathroom Mold |
| Soldering Kit |
| Soldering Kit Contents |
| Soldering Kit Advice |
| Bonsai Tree Classification |
| Growing Bonsai From Seed |
| Bonsai Tree Care |
| Bonsai Tree Training |
| Bonsai Tools |
| Displaying Bonsai |
| Bonsai Calendar |
| Bonsai Plants |
| The Thirsty Light Curve Moisture Meter |
| The Thirsty Light Ladybird Moisture Meter |
| The Thirsty Light Bumble Bee Moisture Meter |
| The Thirsty Light Butterfly Moisture Meter |
| Hanna Instruments |
| Agratronix Portable Coffee Moisture Tester |
| Lawn Aerator |
| Lawn Roller |
| Lawn Rake |
| Lawn Sand |
| Chainshot |
| Chainsaw Gloves |
| Chainsaw Trousers |
| Chainsaw Boots |
| Mac 4 - 20 XT Chainsaw |
| Mac 738 Chainsaw |
| Mac 842 Chainsaw |
| Mac 20X Power Chainsaw |
| Einhell BG-PC 3735 Chainsaw |
| Einhell BG-PC 4040 Chainsaw |
| Einhell BG-PC 5045 Chainsaw |
| Poulan P3314 Chainsaw |
| Poulan P4018 Chainsaw |
| Poulan Pro PP3816AV Chainsaw |
| Poulan Pro PP4218AVX Chainsaw |
| Poulan Pro PP4620AVX Chainsaw |
| Efco MT 4100 SP Chainsaw |
| Efco MT 3500 Chainsaw |
| Efco 132 S Chainsaw |
| Efco 147 Chainsaw |
| Efco 152 Chainsaw |
| Efco MT 7200 Chainsaw |
| Efco MT 8200 Chainsaw |
| Efco MT 3750 Chainsaw |
| Methods Of Obtaining Soil Moisture Levels |
| Hygrometer |
| Psychrometer |
| Rain Gauge |
| Wave Ventilation System |
| Humidity |
| Hygrometer For Keeping Reptiles |
| Humidor |
| Weather Stations |
| Musical Instrument Storage |